
| "My Castle, My Dragon" |
I've long admired Kimberly Smith's wonderful charts, so when she started creating painted canvases for Ruth Schmuff, I was thrilled! Then when Kimberly started creating stitch guides for some of her creations, it was the icing on the cake. (And I LOVE cake)
If you aren't familiar with Kimberly's work, check out her painted canvases here.
http://www.bedeckedandbeadazzled.com/Products/?category=260
Some of her charts are still available here, but keep an eye out on eBay for others.
http://www.bedeckedandbeadazzled.com/Products/?category=13
Now that I've whetted your appetite, Kimberly kindly sent me the PDF version of the stitch guide for her "My Castle, My Dragon" for review. This is going to be a class taught by Kimberly herself at The Black Sheep in Orlando, Florida in June, by the way.
http://www.theblacksheepshop.com/module/class.htm?classId=135845
Since some of Kimberly's designs include a stitch guide (to date Emma's Pillow, Flying Jewels, A Portion of My Garden, Dream Fragment, Austintatious Peacock, and her Bisconu series all have guides included in the purchase price) I thought you'd like to know what her guide for a fairly large and complex piece is like. (If one of Kimberly's canvases with a stitch guide catches your eye, check out her blog to see the finished model.)
http://akimberlydesign.blogspot.com
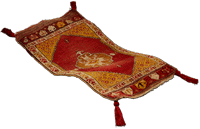
The painted canvas of Dragon itself is a foot long and seven inches high on eighteen count canvas.
http://www.bedeckedandbeadazzled.com/Dragon/
The Dragon stitch guide is twelve pages long plus the cover page with a good photo of the finished piece, a materials list, and a "treasure map" which shows the whole canvas with various sections numbered so you know that Area A is the dragon's snout and Area 17 is the middle tower of the castle.
As you can see from the photo above, this is a pretty elaborate piece. The stitch diagrams show you exactly how to attach the crystal sequins for the castle's garden, how to work each unusual stitch (there are 44 diagrams included and 22 closeup photos not including the map and cover page photo), and tells you the best order to work the various sections. This is not a beginner's canvas but a really determined beginner could probably work the design with help and determination. The instructions are that good!
The guide itself has the materials list on the second page. Shops like to have the materials list at the end so they can put guides in plastic bags and the list can face out on the back for shoppers to refer to without getting the pages dirty taking them out of the bag. That isn't the case here. (NOTE: Kimberly says the materials list is on the back side facing out in the real life version. The PDF file has moved it around!) The only other minor quibble I have with the materials list is that the thread company name isn't set off in any way from the list of thread colors so I found it hard to know if "Kreinik" belonged to the thread numbers above or below it. Enlarging the PDF file really helped here.
Being able to enlarge the PDF file helped me with the diagrams, too. They are in various colors, so if you are color blind, you might have trouble with some of the diagrams. The more elaborate stitches are numbered but the diagrams for common stitches are not. In some cases a closeup photo has lines drawn on it to help you stitch that area, which is a very nice touch! The guide itself really reflects Kimberly's personality (she tells you that the dragon is called Hurrumph, for example) without being too chatty. The instructions are minimal but there are a lot of photos to help, so that although the guide, for example, doesn't tell you which shade of yellow to use for what step for the sun, the photo makes it perfectly clear which goes where. All in all, this is a great guide for a great design. It has everything you need clearly explained so you can stitch a fairly complex piece along with Kimberly.

5 comments:
Hi Jane!!! Thank you so much for a great review! Only one correction which seems a big one to the shop owners. The materials list is on the cover, maybe the PDF version split it. No opening is necessary to see it. I use to put them facing out on the back page but the way shops display, mostly stapled to the canvas. Customers could not readily see the list. So now, it's front and center under the cover photo.
Again, a huge thank you!!
Well, picture me blushing. It is the second page!! I never do that. It is now moving to the backside facing out 😜
Thanks, Kimberly! I added a note above that the PDF file is set up differently than the final, real life, version.
That was too funny on my part. Thank you again Jane!
I live to serve! And it was a pleasure to read through the guide for the dragon and his castle.
Post a Comment